Wednesday

Digital Scrapbooking: The basic approach

Scrapbooking has been a hobby of mine for many years now.  While I don't think you can ever catch up on all of the photos you want to 'scrap', there is a way to get the job done a little quicker and without much effort or knowledge on your part.  If you have adobe or other photo editing software that can read .PSD files, then you are good to go.  Grab yourself some photos and load them into your program.  I chose this one plus a few others:
  
This is me and my hubby last halloween at our church trunk or treat festival.  I was trying to get a scrapbook made for our church with everyone's photos so I turned to my favorite digi-scrap website, scrapbook graphics, for some pre-made 'quick pages' to get the process done in a timely manner. You can buy a kit of about 9 pages for $5 give or take, depending on how many pages are included.  Once you download your 'kit' and load it into your scrapbooking program, its just a matter of plugging your photos into the blank areas, flattening and saving the image, and printing.  The final result of this picture came out like this:

Total time:  15 minutes!
You really CAN do this!
**faces scribbled out for privacy**


$20 Kitchen Chair Re-do


I'm almost embarrassed to show just how dirty our kitchen chair cushions have gotten.  Amazing what happens in such a short amount of time when you have kids, huh?  So, here is my before:

 Dirty, dingy, dusty, boring, and in need of an up-do....BAD!


And the after:

 Colors are bright, fresh, and match my kitchen beautifully.
I caught an amazing sale at Joann's for this fabric.  The boldt was being clearanced out and was half off.  Plus, the weekend I picked it up, they offered and additional half off.  That $20 total included the batting for underneath and additional screws/staples needed to re-attach.  A big kudos to my wonderful hubby for helping me tear out all the staples.  That was pure torture!

Monday

My Soup-er Secret Ingredient


I love soup.  My biggest problem is that its not always cold enough down here in Florida to really enjoy.  However, this year it seems, the weather is cooling off a bit early and the brisk mornings are making me crave the stuff.  So, I have been spending this morning preparing some of my favorites for the freezer.  They are soo easy to make and, once all your veggies are prepped, you are pretty much done, other than watching the pot. I have a confession to make though.  Sometimes the broth for your basic soups (think chicken noodle or veg. beef) can be thin and, to fill me up, I need something more without just eating more fresh bread with it.  My big secret?  I will add a can of cream of 'something' soup or a container of Imagine brand organic gravy.  This makes the soup a little more heartier and adds and extra depth to the flavor.  And if you need an extra reason to add it, this makes the broth stick to the bread you're dunking all the more easier.  So...there you have it...my secret is out!

*** My apologies to the photo source. The website is down and would not link up for me***

Saturday

Autumn Wreath

Ever since I saw this post on pinterest for getting pipe covering at home depot to turn into a wreath, I knew it was calling my name.  I love fall.  One thing I really miss living in Florida is seeing the leaves change colors and the weather cool off.  I wanted to bring a little piece of those colors into my own home to enjoy through Thanksgiving, when Christmas takes over.  Materials used were: multi colored yarn, foam from home depot, my glue gun, and some fake flower stems.  This wreath cost me just over $5 to make (thanks to 60% off sales at Joann's)  and was worth every penny.  Now, every time I open my front door or leave for the day, I've got autumn staring me right in the face!  :-)


This post is linked to Today's creative blog


Wednesday

$1 Frame + Paper = Halloween Wall Decor

I am having soo much fun getting inspired by all of the decorating blogs/pinterest, that I am on such a roll myself.  I spent a good few hours yesterday putting together some wall art with a photo frame I have had lying around for who knows how long.  I didn't really want to put alot of family photos in this one only because I was trying to keep the project focused on color scheme and, well, my family photos just wouldn't cut it.  ( I can be pretty anal sometimes with things being color coordinated).  This frame did come with a little dowel so it could stand upright on its own if you were to choose.  I think, all in all, this project may have run me $5 if I counted costs for the frame and papers individually.  However, I had the materials already.  The paper is from Michael's Midnight Magic paper pack. The drink 'poison' cards were included in it.  That entire pack ran me less than $7 and all of my projects have been done with it.  Talk about getting your moneys worth.  Amazing the things we can do with paper, a paper cutter, and some fancy folding, huh? 


This post linked to today's creative blog

Tuesday

Candy Corn Soap?


Yes, you read that right.  I am a lover of candy corn.  I could eat a whole bag of the stuff in one sitting without evening realizing it.  There's just something about that sweet buttery goodness that I just can't resist.  But, eating gobs and gobs of the stuff is NOT good for my waistline, especially when there are two more weeks til the Big Day.  So, to curb my cravings while still being able to smell the stuff, I decided I needed to make some festive soap.....hence candy corn.  And the best part?  It's calorie free and actually good for me to use!  The ingredients couldn't be simpler, or the process.  I used goats milk melt and pour soap, candy corn fragrance, colored mica powder, and a mold.  Look around your house and in your pantry.  Anything could be a mold, even your bundt pan!  Simply melt small batches of the soap and color them one layer at a time.  You need to wait until a film has formed on your previous layer before pouring the next, otherwise, you will just end up with a marbled mess. (I still mess this up sometimes as I am incredibly impatient.)  Let it cure at least overnight before cutting.  And voila!  Candy corn soap to enjoy in every room of your house as often as you wish!  Happy Halloween!  :)


Witch shoes fit you?

With halloween just around the corner, I really wanted to put together a little something to show the teachers just how much they are appreciated.  They deserve to have some fun with this holiday too!  I decided on filling some witch shoes with candy.  This project has been sooo much fun to do (and very difficult to keep my hands off the chocolate).  All you really need is some paper, a little imagination and a shoe template found here.  This link is part of the split coast stampers blog/gallery/template/ FABULOUS place to be.  I have just been dreaming of ways to use this crazy template.......elf shoes, ruby slippers, birthday presents........


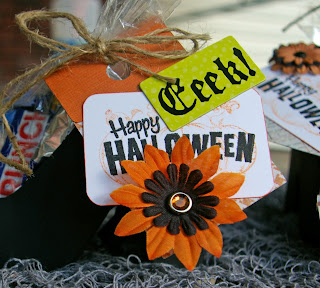
After the shoes were assembled, I filled cellophane bags with chocolate and attached a tag to them with some tweed then shoved them (gently, of course) into the shoe and....POOF!  You have yourself new pointy witch shoes.  I'm thinking this project would also be good for "boo-ing" you neighbors front porches!

Friday

Halloween decorating


I'm falling waaaay behind in my holiday crafting.  It's amazing how time can just get away from you if you are not careful to monitor it.  My first project is dealing with my mantle.  My living room remains really dark and my mantle most certainly needs a paint job.  Nonetheless, its the focal point of the room so it remains a priority.  I want my home to look neat and coordinated (I can be a freak about it, I know).  I went to my good old dollar store to try to find some inspiration.  I just wanted to GET STARTED......that's half the battle.  I found a basic wooden plaque and a sugar jar.  The numbers were on sale at michaels for another dollar, and the 'dragon eyes' label was a free printable I found here from a pinterest search (love that place!).  Just add some paper, mod podge, a drawer pull, spray paint,and stickers and I am all set as I had these items on hand. Total cost was approx. $5 minus the candy. This project was really simple and fun to do.   Now off to do some more work on that mantle!

Monday

Clean the world.....save lives


Wash your hands. Clean the World.
Clean the World celebrates and promotes good hygiene by collecting, recycling and distributing soap to help fight preventable diseases. That's why we are such great supporters of Global Handwashing Day. We know the real value of soap and the power it possesses to improve the lives and living conditions of people who need it most. Join with us in celebration of Global Handwashing Day by making it a point to wash your hands properly several times a day, every day.

Encourage this habit with your children, friends and family. The best way to avoid potentially fatal diseases, such as acute respiratory infection (pneumonia) and diarrheal diseases (cholera, dysentery), is to prevent the germs from spreading. You can do this effectively by regular handwashing with bar soap.

Clean the World wants you to make this Global Handwashing Day the best ever, and we have several resources to help you out. A video on proper handwashing techniques for children, a planning guide full of useful ideas to make your Global Handwashing Day a success, and instructions on how to host a soap drive to promote safe hygiene practices in your community. Always remember to wash your hands. And thanks for helping Clean the World.

***taken from cleantheworld.org

This is a fabulous organization.  Please go to their website for more information here

LinkWithin

Related Posts Plugin for WordPress, Blogger...